Table of Contents
Configuration of S3 connection using rclone
Below you can find the guide for the elementary configuration of rclone tool. Below are two guides. First describes configuration using the command line and second guide describes configuration using the graphical user interface.
Configuration using the command line
Rclone has a configuration wizard, which will guide you step-by-step through the configuration of your S3 data storage.
Windows users need to run Command Prompt and then run the command below.
Linux users can open the terminal window and then run the command below.
rclone config
From the list of options, we will choose New remote via inserting n. Then we need to type the name of our connection/storage, e.g. cesnet_s3. Then we will choose the Option Storage, here Amazon S3 Compliant Storage Providers…
In the next step, we need to choose Option provider, here Ceph Object Storage.
Then it is necessary to choose how to enter S3 credentials. Here we choose Enter AWS credentials in the next step.
In the next steps we enter our credentials access_key_id and secret_access_key which we obtained from the administrator or which we generated.
Then we need to select Option region. We will leave this option empty and then continue with Enter.
Then we need to insert Option endpoint according to the data center, where we have generated the credentials, here for example s3.cl2.du.cesnet.cz.
Next is Option location_constraint. We will leave this option empty and then continue with Enter. .
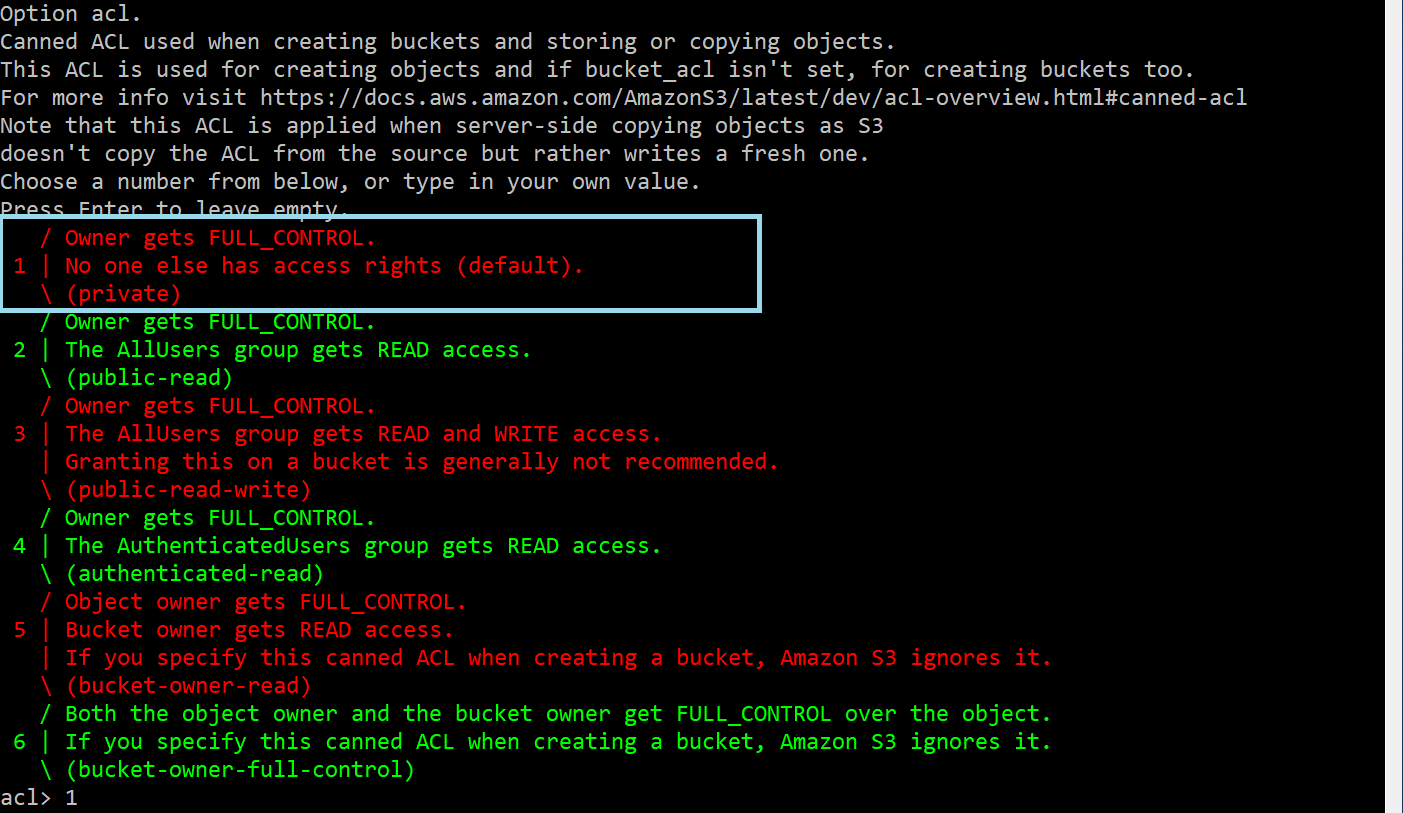
Next point si Option acl, here we can either choose Owner gets FULL_CONTROLL, or we can leave this option empty and continue with Enter
In the next step, we need to choose Option server_side_encryption, here we pick the option None.

Then we can choose Option see_kms_key_id, here we pick the option None.

In the next step we can choose option Edit advanced config, here we choose No, option n.

In the last step, we check the configuration and we will confirm it by typing y.

Rclone configuration using graphical user interface
Firstly you need to run the GUI. Windows users need to open Command Prompt and run the command below. Linux users need just open the terminal window and run the command below.
rclone rcd --rc-web-gui
The next steps are identical for Windows and Linux.
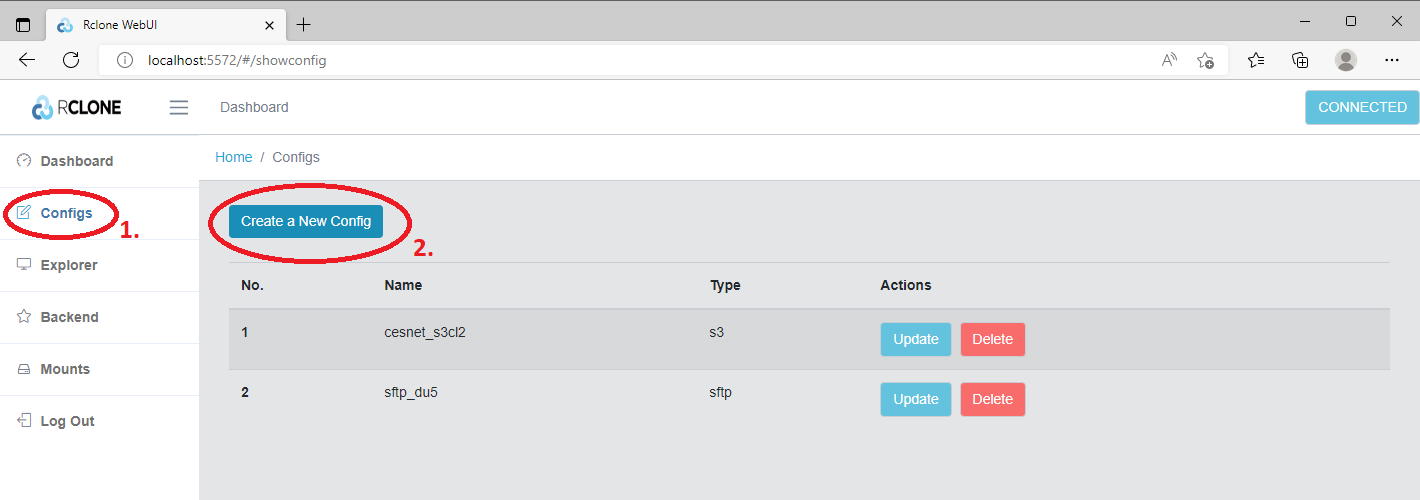
After starting up the graphical interface we click in the left menu on the Configs (1) button and then on the Create a New Config (2) button.
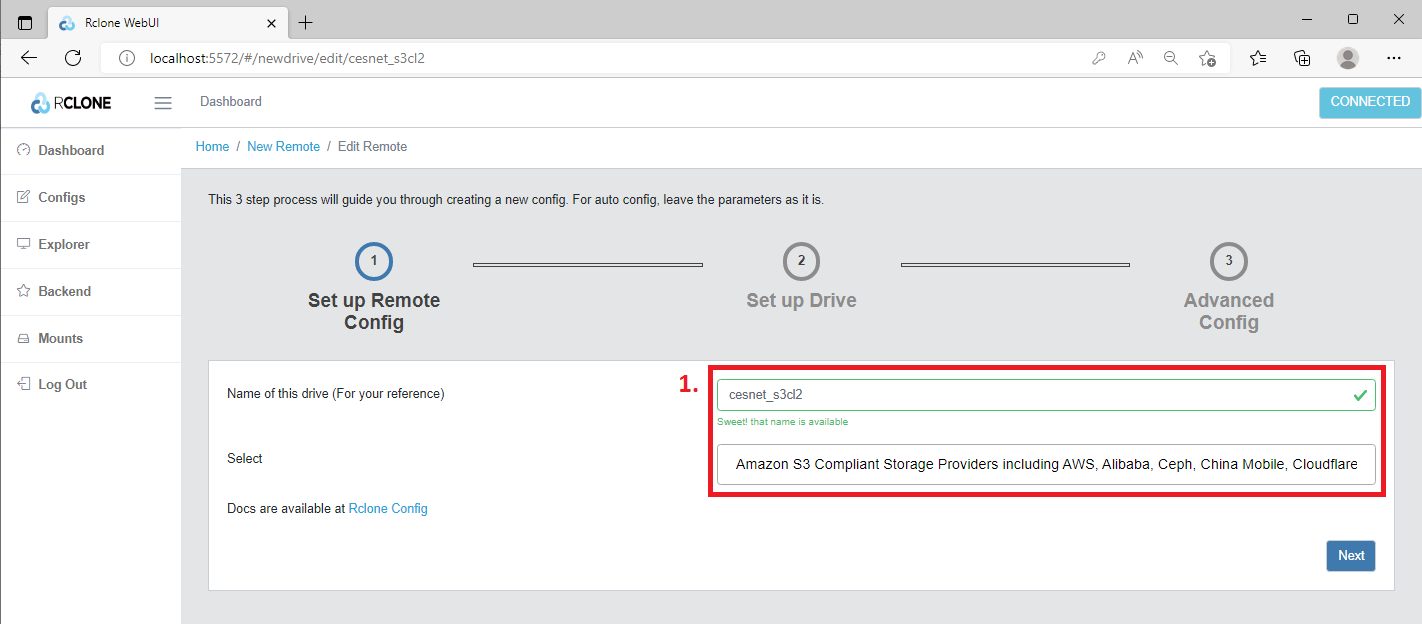
In the displayed window, we insert the connection name in our example “cesnet_s3cl2” and then we choose the option Amazon S3 Compliant Storage Providers.
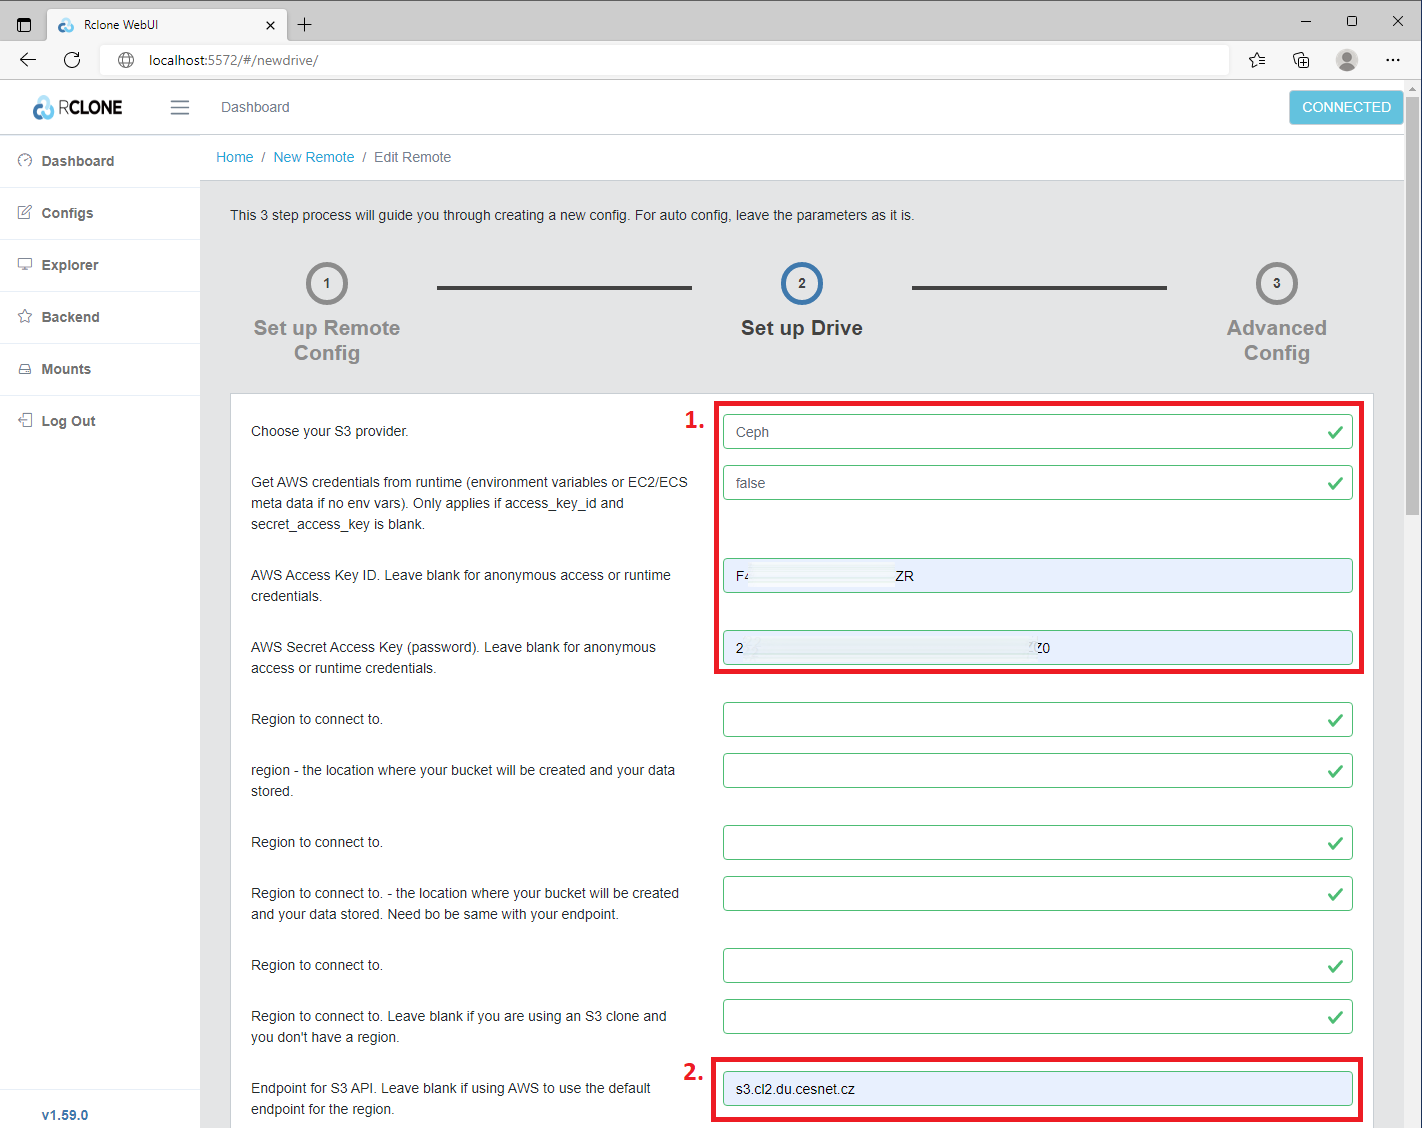
In the next step, we need to insert credentials (1) which we obtained from the administrator or which we generated. You have to insert Ceph into the line denoted Choose your S3 provider. Then we need to insert the S3 endpoint address (2). Then we can click Next.
Connection of the data storage and transferring the data
After the configuration, we can start to transfer the data.
Uploading the data from your local machine
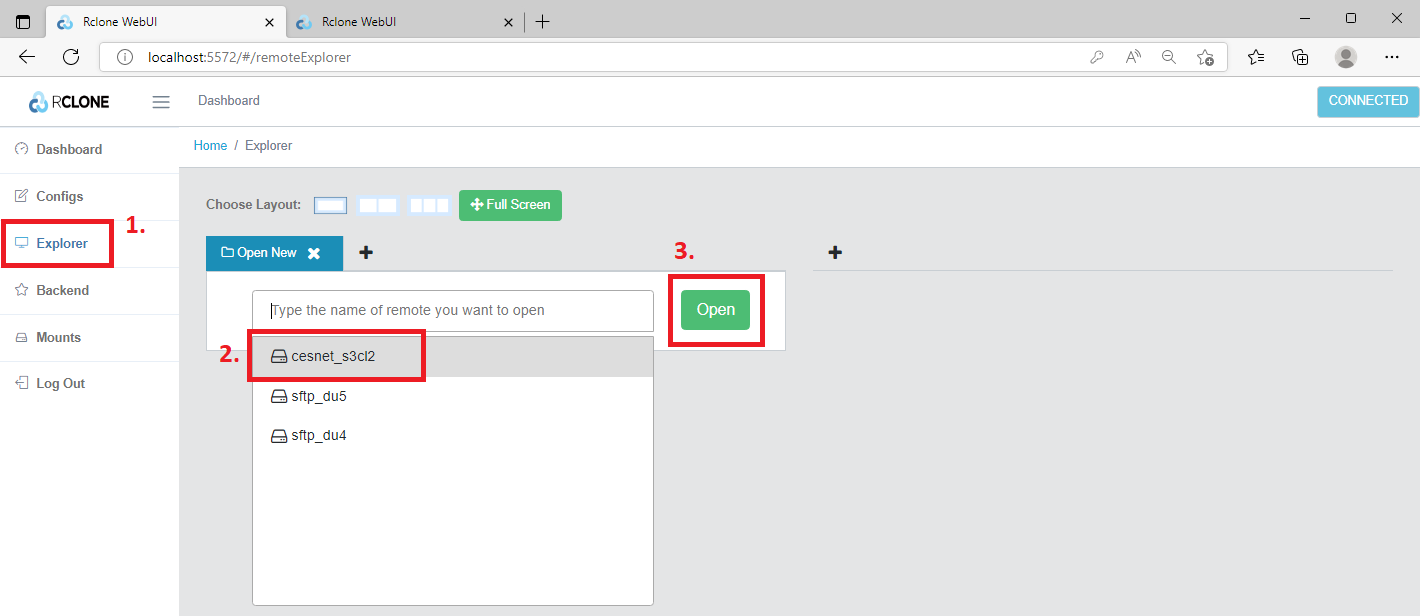
In the left menu click on the Explorer (1) button. Then select the name of configuration (2), for example “cesnet_s3cl2”. Then you click on the Open (3) button. Then there should be a window with the buckets and files from the configured data storage.
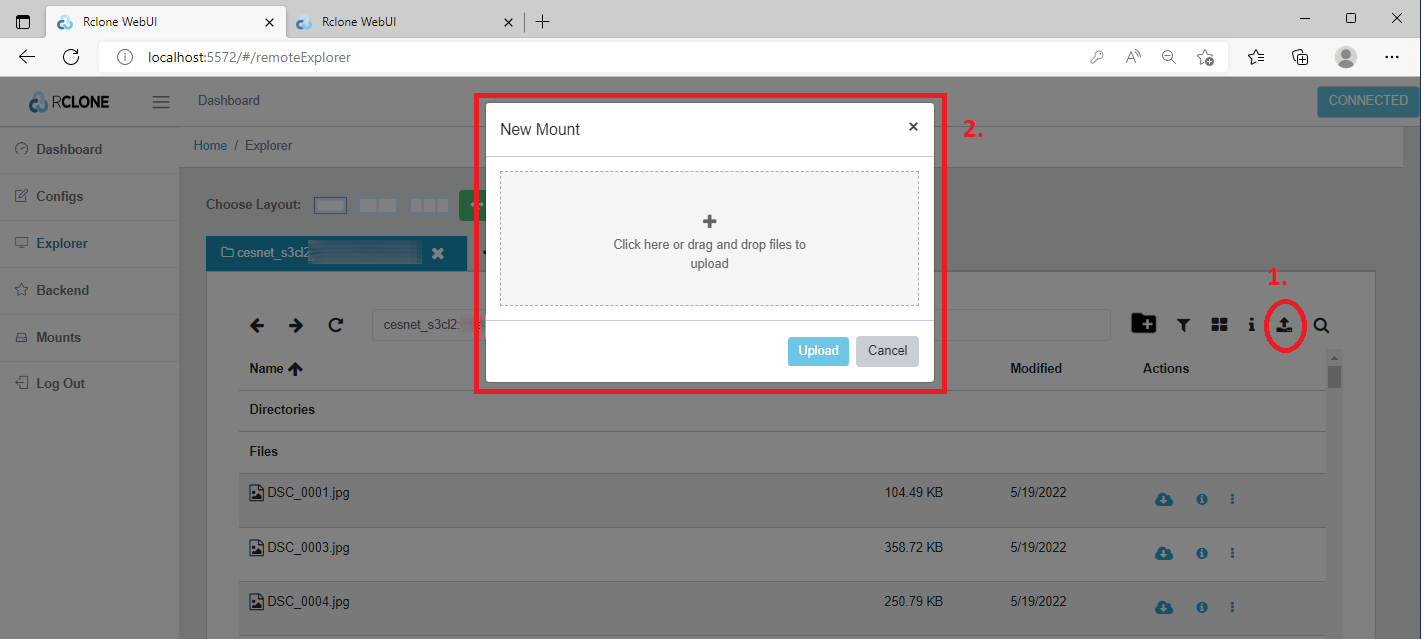
If you wish to upload your data then in the displayed window click on upload icon (1). Then you can select the data from your disk or drag and drop them into the window.
Windows
C:\Users\DedaLebeda\AppData\Roaming\rclone\rclone.conf

[cesnet_s3]
type = s3
provider = Ceph
access_key_id = my-access-key
secret_access_key = my-secret-key
endpoint = s3.cl2.du.cesnet.cz
acl = private
Linux
~/.config/rclone/rclone.conf

[cesnet_s3]
type = s3
provider = Ceph
access_key_id = my-access-key
secret_access_key = my-secret-key
endpoint = s3.cl2.du.cesnet.cz
acl = private


