Table of Contents
WinSCP
WinSCP is one of the tools, that can be utilized to access your data stroge at CESNET Data Care. WinSCP is freeware working under Windows. WinSCP supports protocols FTPS and SCP/SFTP).
WinSCP (FTPS)
The program is free to download at: http://winscp.net/eng/download.php
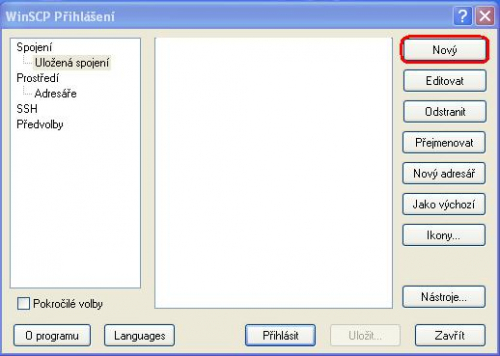
After you installed WinSCP click on button “Nový”.
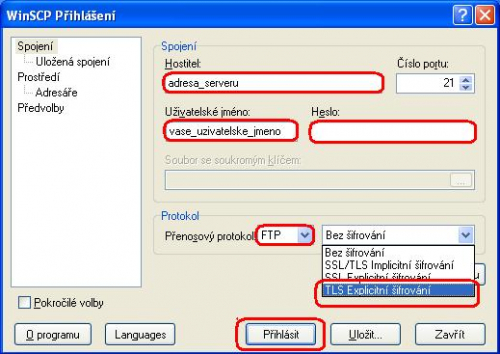
Fill in all as shown figure below and push “Přihlásit”.
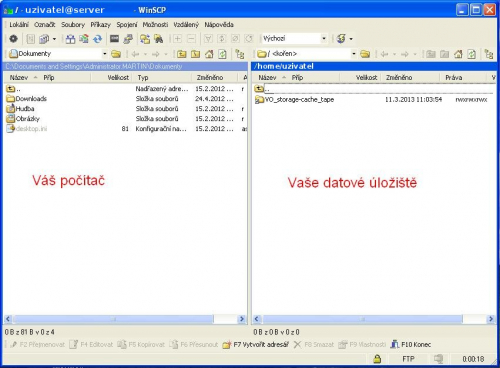
After that you can copy files from your computer to data storage and back.
WinSCP (SCP/SFTP)
One of the tools that can be used to connect over FTP/FTPS/SCP/SFTP protocols in Windows is WinSCP.
The program is free to download at: http://winscp.net/eng/download.php
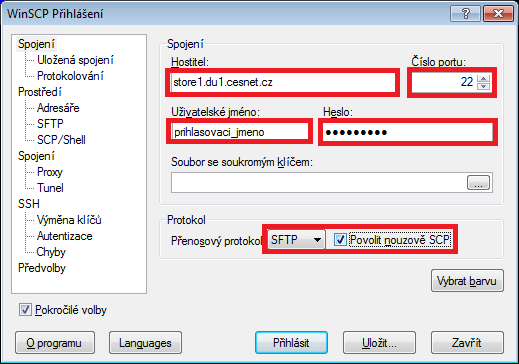
After you install WinSCP, run the program and fill in server address.
Ostrava ssh.du4.cesnet.cz
Jihlava ssh.du5.cesnet.cz
Ostrava ssh6.du4.cesnet.cz
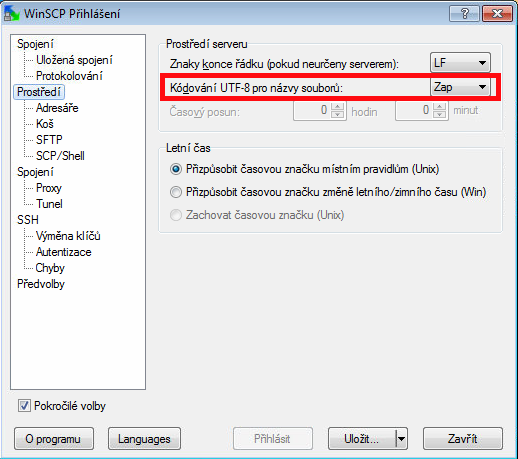
Next in the section “Protocol” we change transfer protocol to SFTP. In some case the protocol SFTP doesn't work properly and it is good activate function “Povolit nouzově SCP”. Instead of SFTP you can choose clear SCP protocol as well. After you selected protocol SFTP/SCP, the port number will change automatically to 22. In the next step we will enter credentials (username and password). For proper handling of files with UTF-8 names switch to the tab “Prostředí” and enable UTF-8 encoding. If you have all set, you can log in with “Přihlásit” or save setting with “Uložit”.
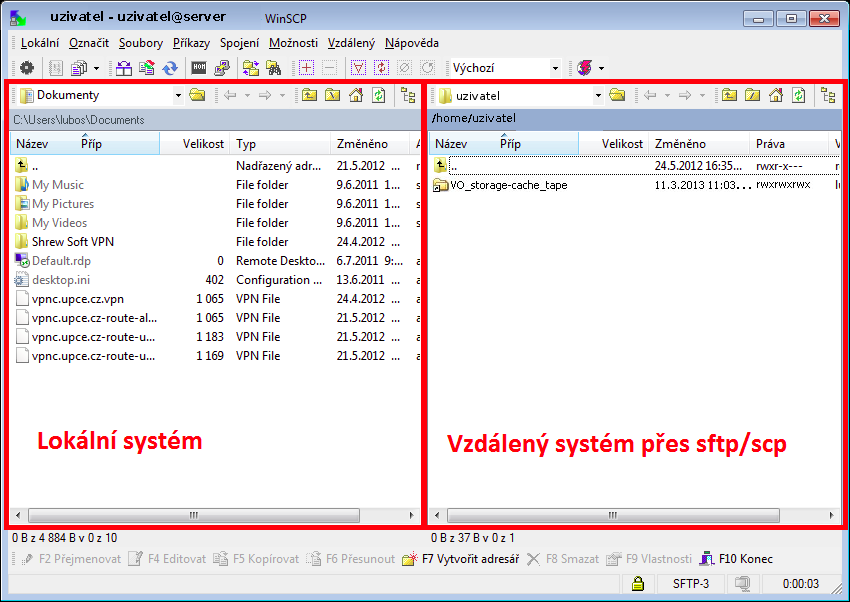
After you log in successfully, we can copy files to the server or from the server - in default layout is left window local system and right window remote system.
WinSCP (SCP using SSH key pair)
This guide describes the configuration of WinSCP tool to be used with SSH keys.
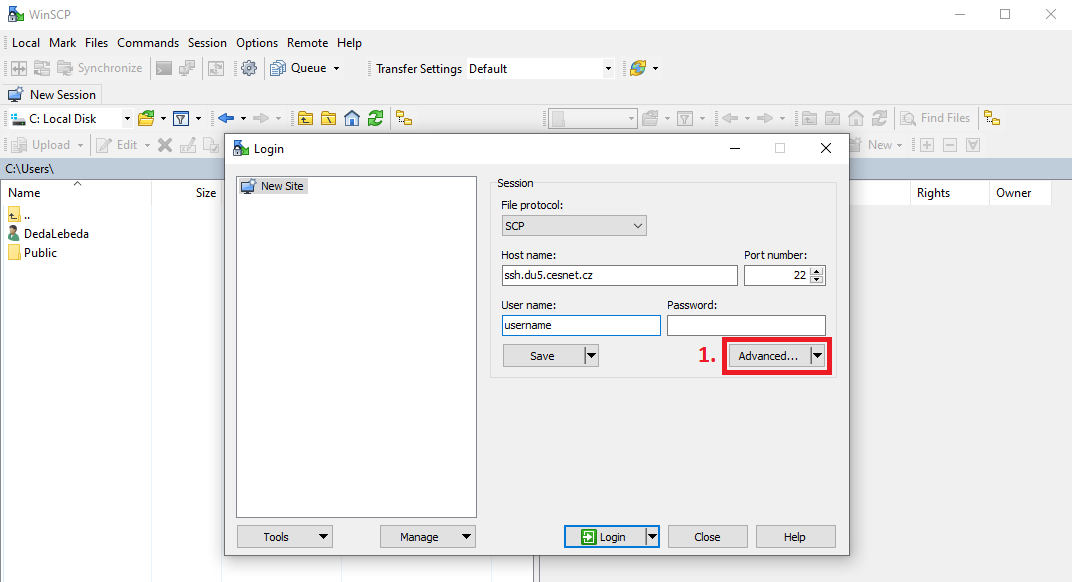
After you start WinSCP tool click on New Session. Then in the displayed dialog window select File Protocol SCP. Then the address Host name, port number 22 and your username. After that click on the button Advanced (1).
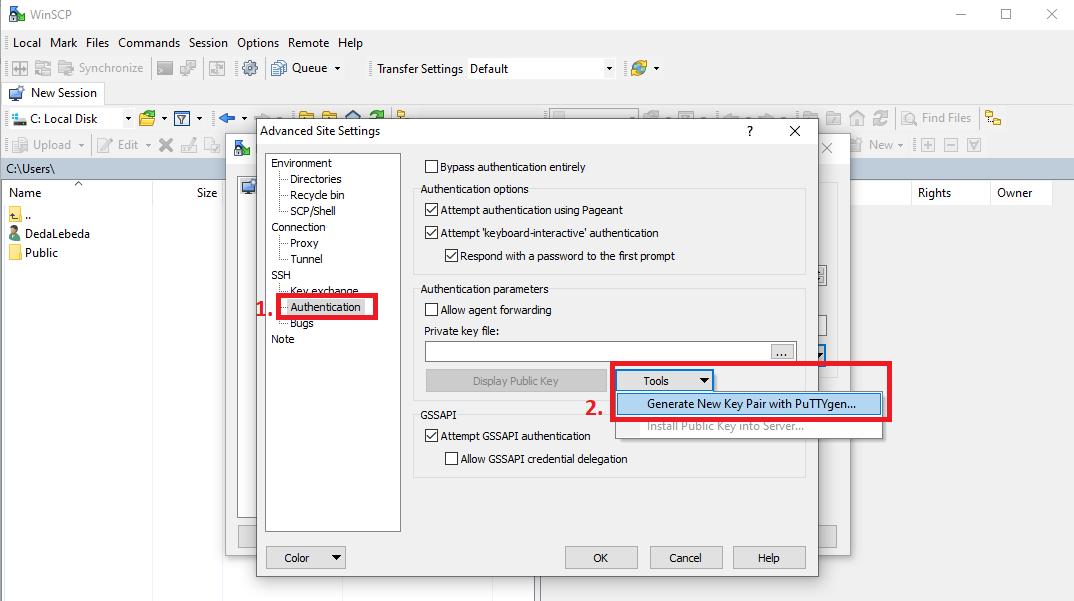
In the displayed window click on the Authentication (1) button and then on the Tools button and Generate New Key Pair with PuTTYgen (2).
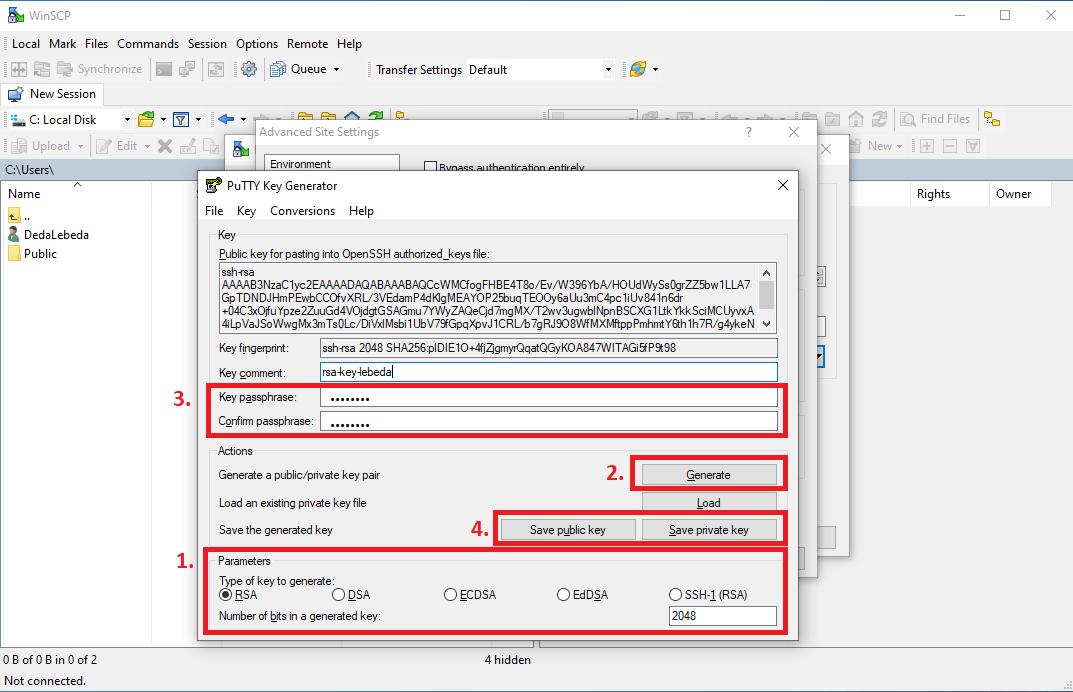
In the PuTTY Key Generator select Type of the key to generate (1) and then click on the Generate (2) button. Once the key is generated choose the private key passphrase (3). After that save the key pair (4). Now you can close the PuTTY Key Generator.
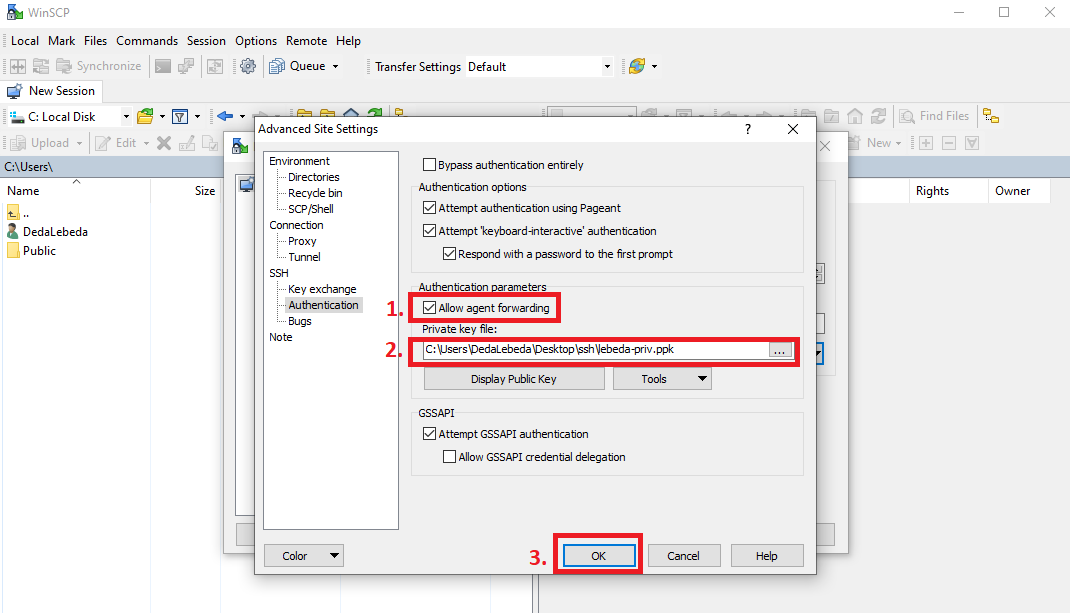
Now you can tick Allow agent forwarding (1) and insert the path (2) of the private key which you saved in the previous step. Then click OK (3).
References
WinSCP: http://winscp.net
