Table of Contents
Connecting object S3 storage in Veeam
VEEAM itself cannot produce buckets, it can only connect existing ones. To create a bucket, use aws-cli or s3cmd or leave it when configuring the repository bucket (s) establish us.
Important configuration:
Due to the backup data processing technology when the backup data is split into data blocks, which are then stored in S3 as individual objects, large amount of backup data will translate to a large amount of objects in S3. This can cause issues with in S3 endpoint.
To mitigate that it is recommended to configure the backups to use larger block sizes. This setting is configured on the job level so in order to configure larger block sizes the original backup jobs must be adjusted (job edit - „Storage“ step - „Advanced…“ - „Storage“ tab - „Storage optimization“ parameter). Default block size is set to 1 MB, it can be changed to 4 MB or 8 MB (only if enabled with the registry key UIShowLegacyBlockSize according to https://www.veeam.com/kb4215 for VBR versions later than v11a) thus reducing the amount of data blocks sent to a bucket.
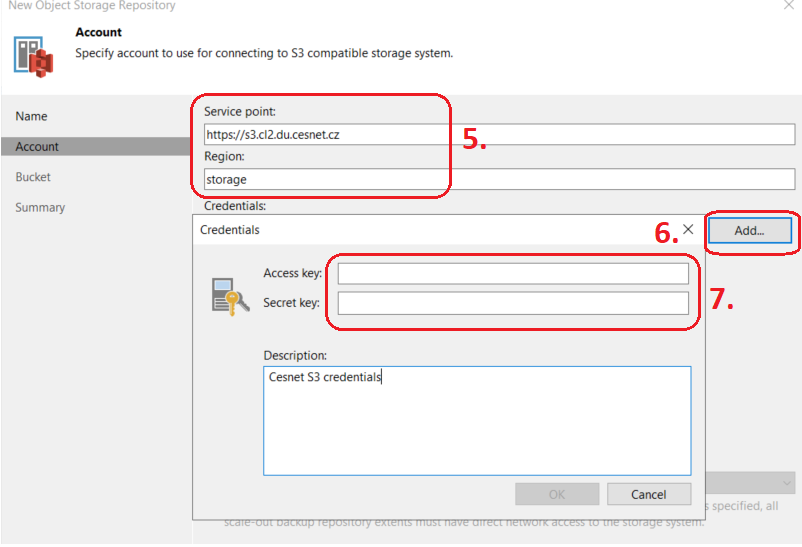
For operational reasons, it is very important to limit the number of parallel connections, otherwise you run the risk of temporarily suspending your account, because without this restriction, Veeam behaves too aggressively and restricts other users using the same S3 access gateways. You will find how to set the connection limit at the point number 4 of the manual.
Connection procedure:
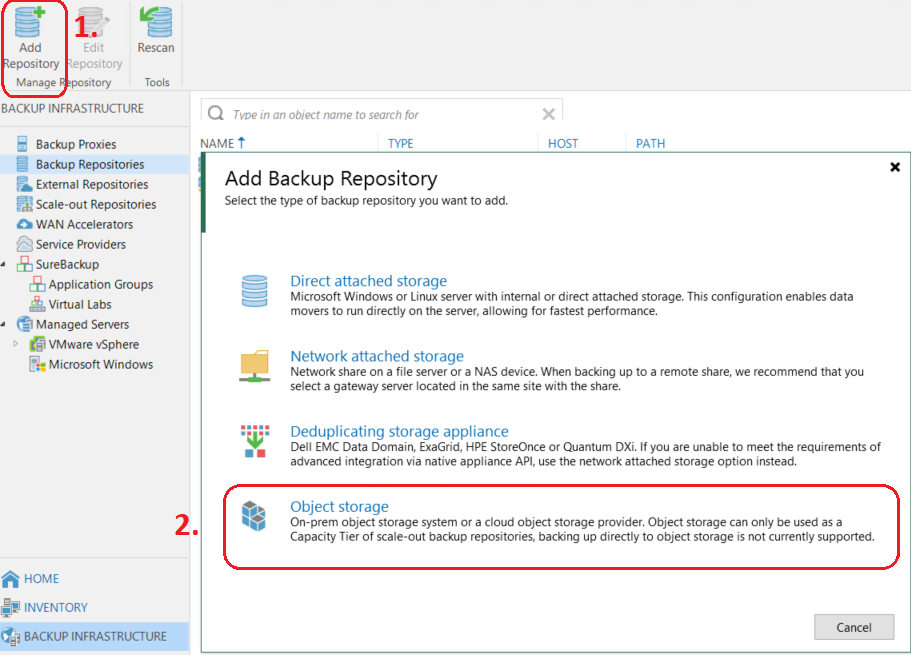
1. Add new Repositories
2. Object storage
3. Select S3 Compatible

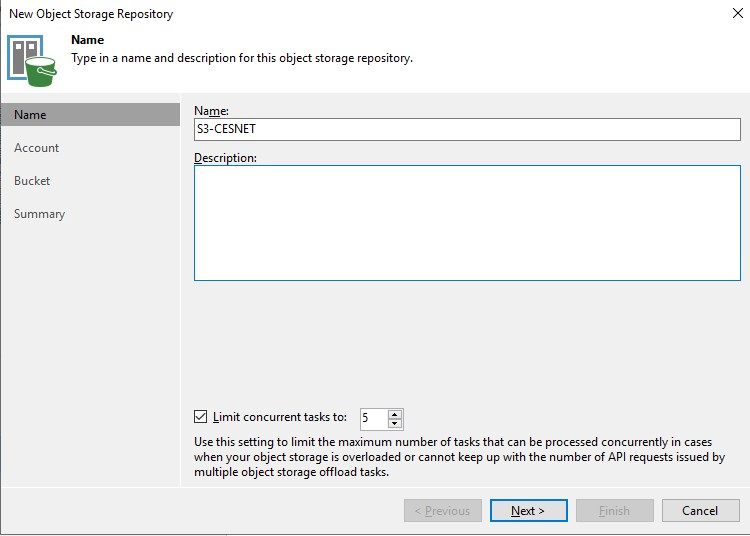
4. Name repositories> NEXT
For operational reasons, it is very important to limit the number of parallel connections, otherwise you run the risk of temporarily suspending your account, because without this restriction, Veeam behaves too aggressively and restricts other users using the same S3 access gateways.
5. Fill in the Service point according to the supplied information, fill in "storage" in the Region
6. Add sideboards via Add
7. Fill in the Access key and Secret key according to the supplied information
8. Confirm and check the "Use the following gateway server"> NEXT checkbox
9. From the drop-down menu, select the created Bucket
10. Select the destination folder in Bucket, if it exists, if not, create it
11. Optionally fill in the Limit setting (not required). Do not use the Immutable option! > NEXT

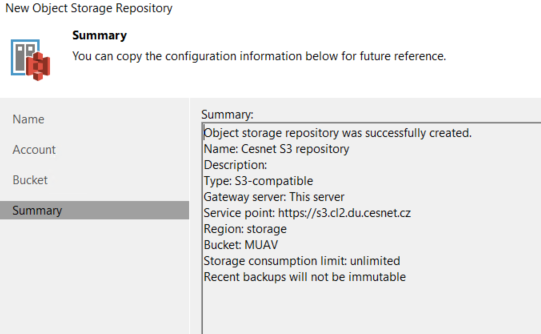
12. Finish
This guide can be used for version 10 and higher.