Table of Contents
The tutorial for transferring your data from the old Data Storage (Jihlava, Brno) to the new Data storage e.g. Ostrava.
This tutorial describes methods and recommendation, how to move your data from the old Data Storage (DS) Jihlava(du2)/Brno(du3) DS to Ostrava(du4) DS. It is useful for you just in case we asked you to perform such an action.
Jihlava/Brno DS reaches the end of its operating life and will be decommissioned soon. That is the reason why we prepared new data space in Ostrava DS for you. As the DS operator is not able to recognize which data is useful for you to be transferred, we are asking you to decide what data to transfer.
Most users from user groups use current DS for backups (i.e. backup copy of their own systems), part of user groups retains data of permanent value (i.e. primary valuable data). Some of user groups have both type of data, however following tutorial is divided according to data classification mentioned above:
In case you need any help with data transfer, please contact user support.
Migration of regular backups
Current backups on Jihlava/Brno DS will be retained at least for two more months following the completion of the whole transfer operation. It is not necessary to transfer old backups to Ostrava DS. We recommend you to perform a standard full backup to Ostrava DS and then continue in regular backuping, as you are used to do, but to Ostrava DS. Old backups in Jihlava/Brno DS can be kept in Jihlava/Brno DS, just for case that old backups need to be restored.
Technical setup is dependent on particular backup tool. Please do not forget to make at least one full backup to Ostrava DS.
Migration of permanent archival data
We recommend that users with permanent archival data move their data from Jihlava/Brno DS onto Ostrava DS, it is a responsibility of the users to do so. Following tutorials are suited for beginners, however we recommend for advanced users to follow it as well. The howtos describe most effective techniques to transfer your data.
If you prefer graphic user interface, we recommend to use Globus service. If you are comfortable with command line, you can use rsync protocol directly on DS (in ssh session) using nohup tool.
Globus--web interface utilizing GridFTP
Globus is service for copying large amount of data over long distance using a web interface. Data is transferred between two endpoints, in this case we set up Jihlava/Brno DS and Ostrava DS as an endpoints. Using web interface with following tutorial, you can setup what shall be transfered to Ostrava DS.
To use Globus service, it is necessary to be registered. In case you already have Globus account, you can continue to data transfer.
Registration (create a Globus ID)
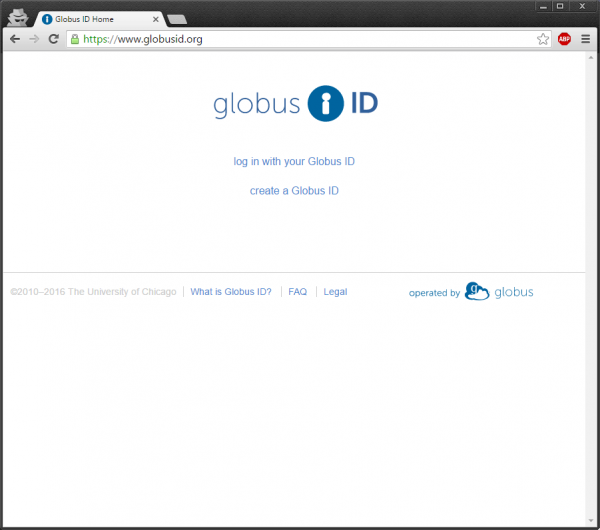
1) Insert address www.globusid.org into your web browser.
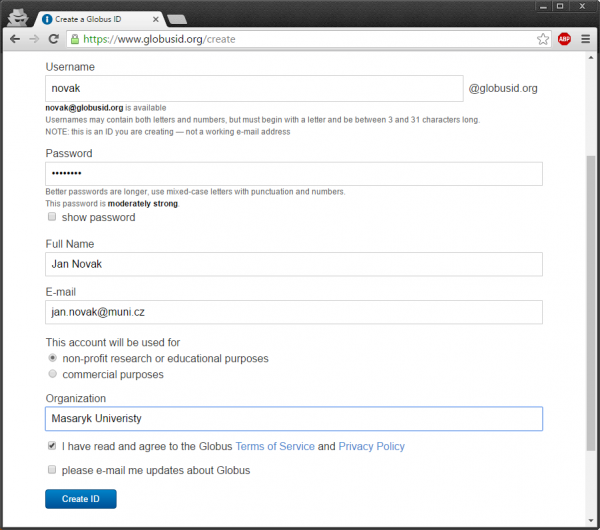
2) Please fill the registration form. There you can choose username and password, which will be used in step 8). After you have filled the form, please click on Create ID button.
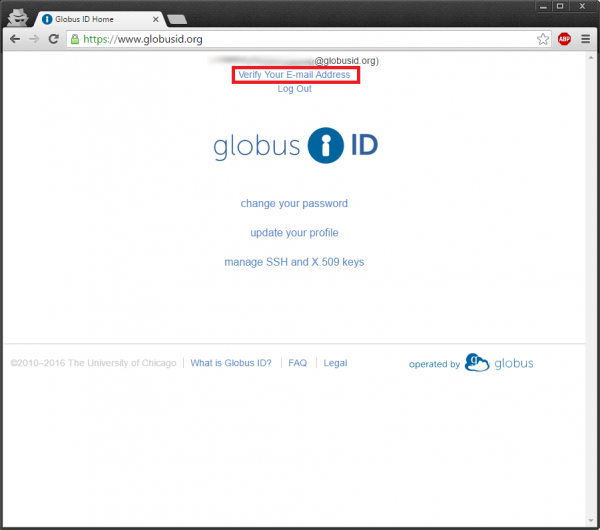
3) Now you must verify your email address. Please click on Verify Your E-mail Address.
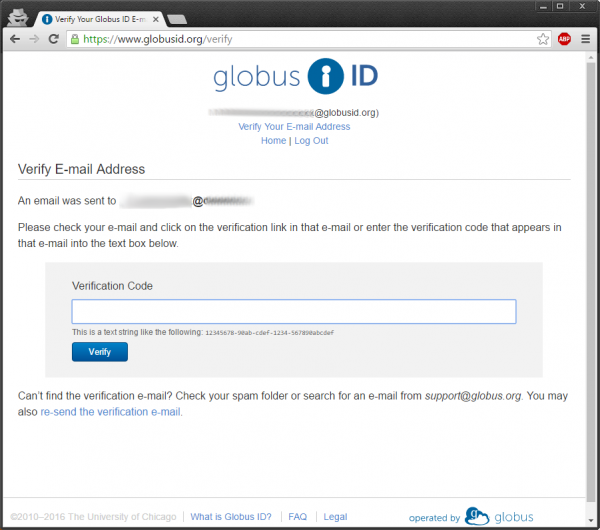
4) Now you should receive an email with verification code. Please copy received verification code into the field Verification Code and click on Verify button.
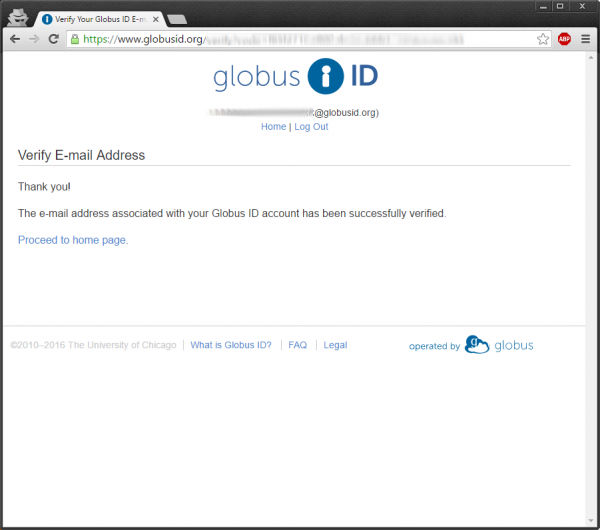
5) After successful verification of your email address you will appear on the following website.
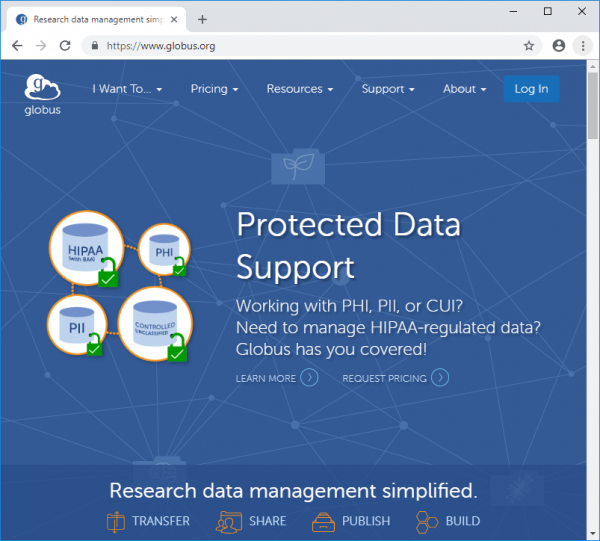
6) Now you have successfully created Globus ID and you can start with Globus service itself at www.globus.org. Please click at Log In button in the right upper part of the page.
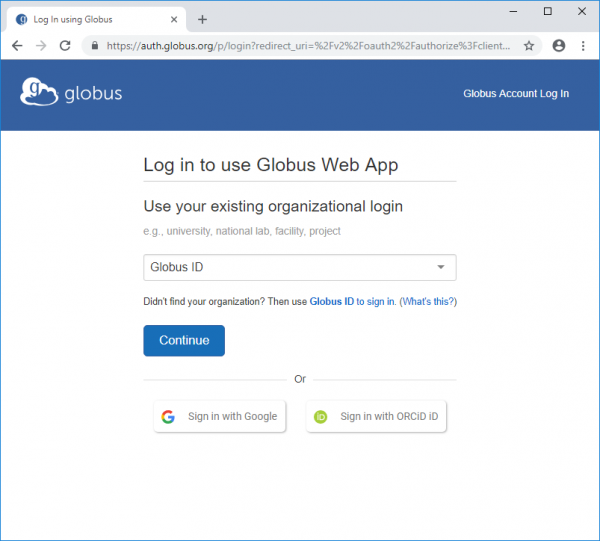
7) Now please choose Globus ID in the list of institutions and click on Continue button on the following page.
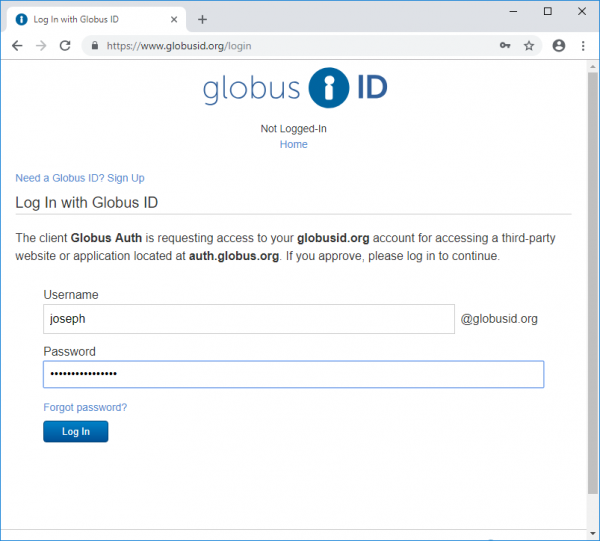
8) Now please insert your username and password, which you have set in the step 2.
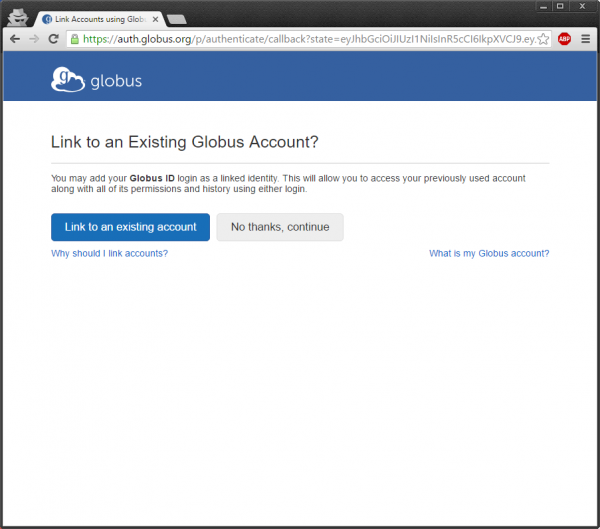
9) On the following page you can interconnect your Globus ID with another existing account, for instance Google - the advantage is, that you can use only one account for more services. In case you want to use only Globus ID, please click on the button: No Thanks, continue.
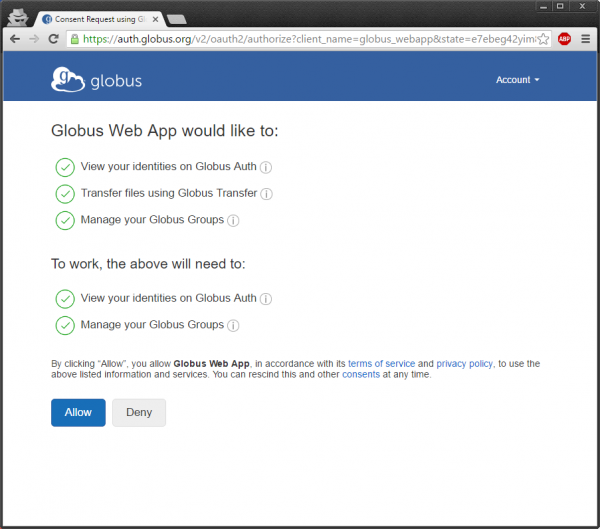
10) Now you have to allow Globus service to process your personal info. In case you agree, please click on the Allow button.
Transfer Files
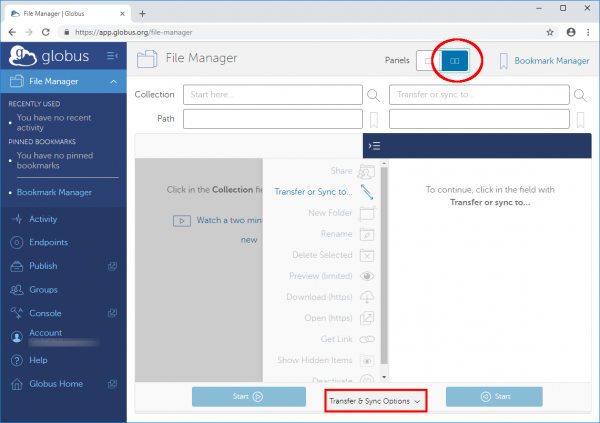
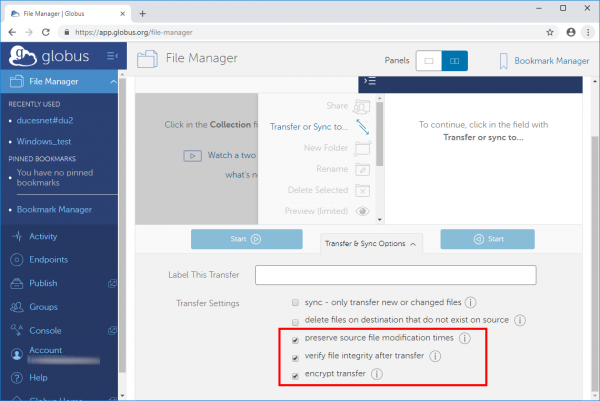
i) To transfer your data please click on File Manager button in the left menu. Then click in the upper side of the webpage on the button to show two pannel interface. Then continue on the bottom and click on the Transfer & Sync Options button.
Then continue on the bottom and click on the Transfer & Sync Options button.
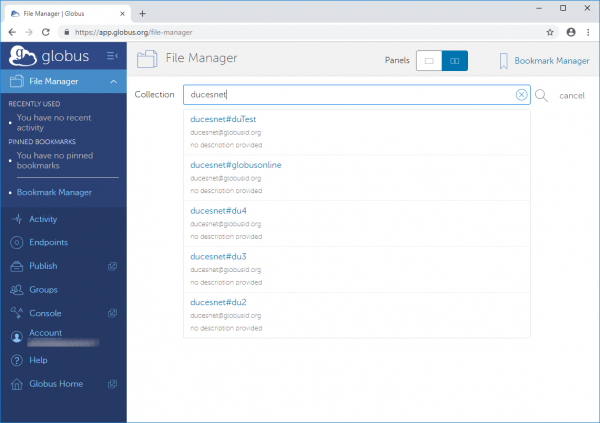
ii) Now please click in the Collection field and insert ducesnet, now you can choose certain CESNET data storage address from pop-up box.
Jihlava ducesnet#du2
Brno ducesnet#du3
Ostrava ducesnet#du4
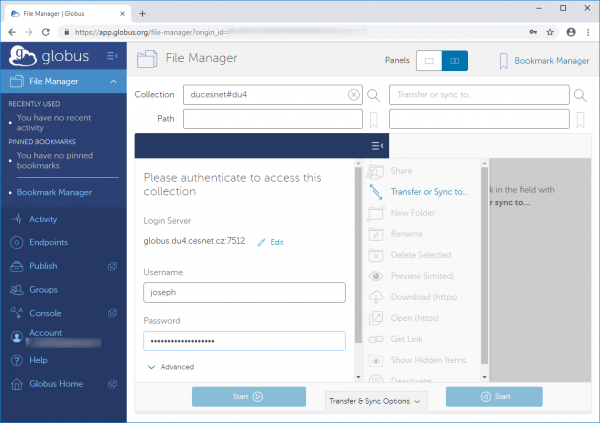
iii) From the previous dialog box you can select for instance ducesnet#gu4. You will be asked to enter your username and password for data storage access.
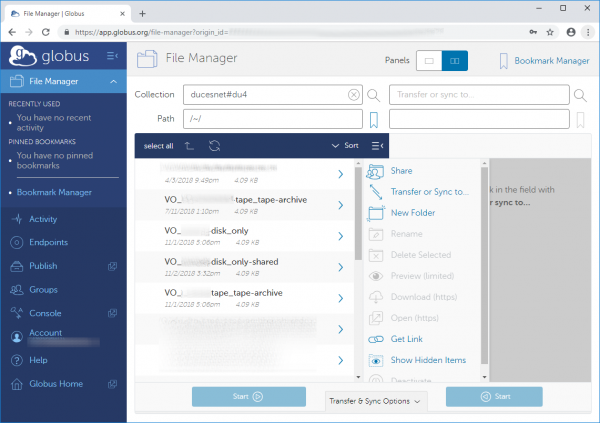
iv) There should appear the content of your home directory on the selected data storage after successful login.
v) In case you want to copy data between two remote data storage, you can repeat step [#bod_ii|ii]] for the second window and you can start with transferring your data.
Final result of data transfer will appear in Globus service dashboard.
Data transfer using rsync protocol
If you prefer graphic user interface, we recommend to use the Globus service. If you are comfortable with command line, you can use rsync protocol deployed directly on DS (in ssh session). Taking the estimated time of large data transfer into account, we urge you to use the nohup program. That ensures that the transfer won't be killed when your ssh session is terminated for any reason.
1. Login to DS
ssh username@ssh.du2.cesnet.cz
2. Selection of the directory to be transferred
Now we will list home directory and we can continue to the directory, which we wish to transfer to the new Data Storage.
username@store:~>ls -alh
lrwxrwxrwx     1 root     einfra   41 Jan 21  2017 VO_storage-cache_tape -> ../../cache_tape/VO_storage/home/username
lrwxrwxrwx     1 root     einfra   40 Jan 21  2017 VO_storage-tape_tape -> ../../tape_tape/VO_storage/home/username
username@store:~>cd VO_storage-tape_tape
3. We will use rsync protocol wrapped by nohup to transfer selected directories. Please follow the steps:
a) Start the transfer using rsync protocol, following example is for VO_storage
username@store:~/VO_storage-tape_tape>USER_NAME=username ; nohup rsync -av -e "ssh -4" ./name_of_copied_folder ${USER_NAME}@ssh.du4.cesnet.cz:/home/${USER_NAME}/VO_storage-tape_tape/ >> /home/${USER_NAME}/VO_name_${USER_NAME}.log 2>&1
b) After inserting your password please continue with ctrl + z, it will stop the running job. That step is necessary to allow your job to run in background. By this is ensured that your job will run even though you log out from a terminal. After pressing ctrl + z there should appear following notification in the terminal, number in a square bracket will be used to move your job to background:
username@ssh.du4.cesnet.cz's password:
^Z
[1]+  Stopped                 nohup rsync -av -e "ssh -4" ./name_of_copied_folder ${USER_NAME}@ssh.du4.cesnet.cz:/home/${USER_NAME}/VO_storage-tape_tape/ >> /home/${USER_NAME}/VO_storage${USER_NAME}.log 2>&1
c) Now we can run the process in background using command bg with the number from square bracket mentioned in previous step.
username@store:~/VO_storage-tape_tape>bg 1
[1]+ nohup rsync -av -e "ssh -4" ./name_of_copied_folder ${USER_NAME}@ssh.du4.cesnet.cz:/home/${USER_NAME}/VO_storage-tape_tape/ >> /home/${USER_NAME}/VO_storage${USER_NAME}.log 2>&1 &
d) Now please check that your particular job has been started. In the job status should be mentioned Running. This status change is not immediate, it can take few seconds for the change to appear.
username@store:~/VO_storage-tape_tape>jobs
[1]+  Running                 nohup rsync -av -e "ssh -4" ./name_of_copied_folder ${USER_NAME}@ssh.du4.cesnet.cz:/home/${USER_NAME}/VO_storage-tape_tape/ >> /home/${USER_NAME}/VO_storage${USER_NAME}.log 2>&1 &
Detail manual for rsync program can be found here.
4. Leaving the session
If you wish to leave the session, it is necessary to use command disown, it will remove the job from the table of active jobs. Consequently you can detach the session by using exit command, or press the ctrl + d keys.
username@store:~/VO_storage-tape_tape>disown
username@store:~/VO_du_test-tape_tape>jobs
username@store:~/VO_du_test-tape_tape>exit
If you wish to check the status of your data transfer, you can have a look in *.log file, which is located in /home/username/VO_nazev_vo_username.log. You can use for instance:
username@store:~>tail -n 20 /home/username/VO_name_username.log
5. Data integrity check
After finishing your data transfer please repeat steps 2 a 3. If no further transfer occurs, it means that all your data was successfully transferred. The output of rsync protocol can be found in the log file: /home/username/VO_name_username.log

